Introduction to At-Home Piercings
In recent years, the practice of piercing yourself at home has gained traction among individuals looking to express their personal style without the constraints of salon appointments. This trend is fueled by DIY culture, which encourages creativity and individualism. More people are seeking the freedom to customize their bodies, leading to an increase in the popularity of at-home piercings. However, while the concept may seem appealing, there are significant considerations to keep in mind.
Before embarking on the journey of piercing yourself, it is essential to understand the necessary tools and supplies. Basic piercing kits, which can be purchased online or at specialty stores, often include sterilized needles, aftercare solutions, and jewelry designed for various types of piercings. Additionally, some individuals may opt for specific tools like a taper or a piercing gun for certain body locations. Regardless of the chosen method, ensuring the safety and cleanliness of the environment in which you are piercing is of utmost importance to reduce the risk of infection.
Safety is another critical factor when considering at-home piercings. Unlike professional piercers, who are trained to follow strict hygiene protocols, individuals piercing themselves may lack the experience to avoid complications. Prior research and preparation are crucial to minimizing potential health risks. It is advisable to learn about anatomy, proper techniques, and aftercare practices before engaging in any self-piercing activities. Recognizing the difference between a well-performed piercing and a potentially dangerous one is vital.
Ultimately, while piercing yourself can be an exciting form of self-expression, it requires thoughtful planning and adherence to safety practices. Understanding trends, tools, and safety protocols will aid in ensuring a positive experience in the realm of at-home piercings.
Safety First: Sanitize Everything
When considering the option of piercing yourself at home, it is critical to prioritize cleanliness and sanitation. The risk of infection is a significant concern if proper hygiene practices are not followed. To reduce this risk, begin by thoroughly washing your hands with soap and warm water for at least 20 seconds. This initial step is vital, as your hands are the primary tools that will be interacting with sterile equipment and your body.
Next, focus on the area around the piercing site. This involves cleansing the skin thoroughly with an antiseptic solution, such as isopropyl alcohol or a saline solution. Using a cotton ball or sterile gauze, gently clean the area for several seconds to eliminate any bacteria or contaminants that could lead to complications. It is essential to allow the antiseptic to dry fully before proceeding with any procedures. This drying time is crucial, as it ensures that the antiseptic solution has had maximum effectiveness against potential pathogens.
Before you begin the actual piercing process, ensure that you have all your equipment ready and sanitized. This includes the needle, jewelry, and any instruments you may be using. Consider using a sterile piercing kit, which often includes pre-packaged and sterilized tools specifically designed for this purpose. If using individual items, make sure to disinfect them thoroughly using an appropriate sterilization method, such as boiling or soaking in alcohol. Maintaining a clean workspace is equally important; make certain the surface you will be working on is free from dirt and germs. Wipe it down with an antiseptic solution as well to create a sterile environment for your procedure.
By taking these precautionary measures, you significantly improve your chances of having a successful and safe at-home piercing experience. In the following sections, we will explore additional steps and considerations to ensure a smooth process and positive results.

Disinfecting Your Piercing Needle
When it comes to piercing yourself at home, ensuring that the tools you use are properly disinfected is paramount to preventing infection and promoting healing. Utilizing a sterile needle is essential, as it minimizes the risk of introducing bacteria into your body through the fresh piercing. There are various methods for disinfecting your piercing needle, each with its advantages and suitability.
One of the most common methods for sterilizing a piercing needle is through boiling. To do this, you should first clean the needle thoroughly with soap and water, eliminating any contaminants. After rinsing, place the needle in a pot of boiling water for at least 5-10 minutes. Be sure to handle the needle with clean, sterilized tongs to avoid contamination when removing it from the water.
Alternatively, alcohol is an effective disinfectant. You can immerse the needle in isopropyl alcohol (at least 70% concentration) for about 10-15 minutes. After soaking, allow the needle to air dry on a clean surface. Another option is using an autoclave, which is a specialized machine that sterilizes instruments using high-pressure steam. Though this method is more commonly utilized in professional settings, it is known for being one of the most effective means of achieving sterility.
For those who prefer commercial solutions, products that are specifically designed for piercing tools are widely available. Look for approved sterilizing sprays or wipes from reputable brands. These products often contain powerful disinfectants that can kill harmful microorganisms effectively. Always check the product labels for clear instructions on how to use them safely.
Prioritize the disinfection of your piercing needle before starting the process of piercing yourself to ensure a higher degree of safety and reduce the likelihood of complications. This step is a critical foundation for a successful home piercing experience.
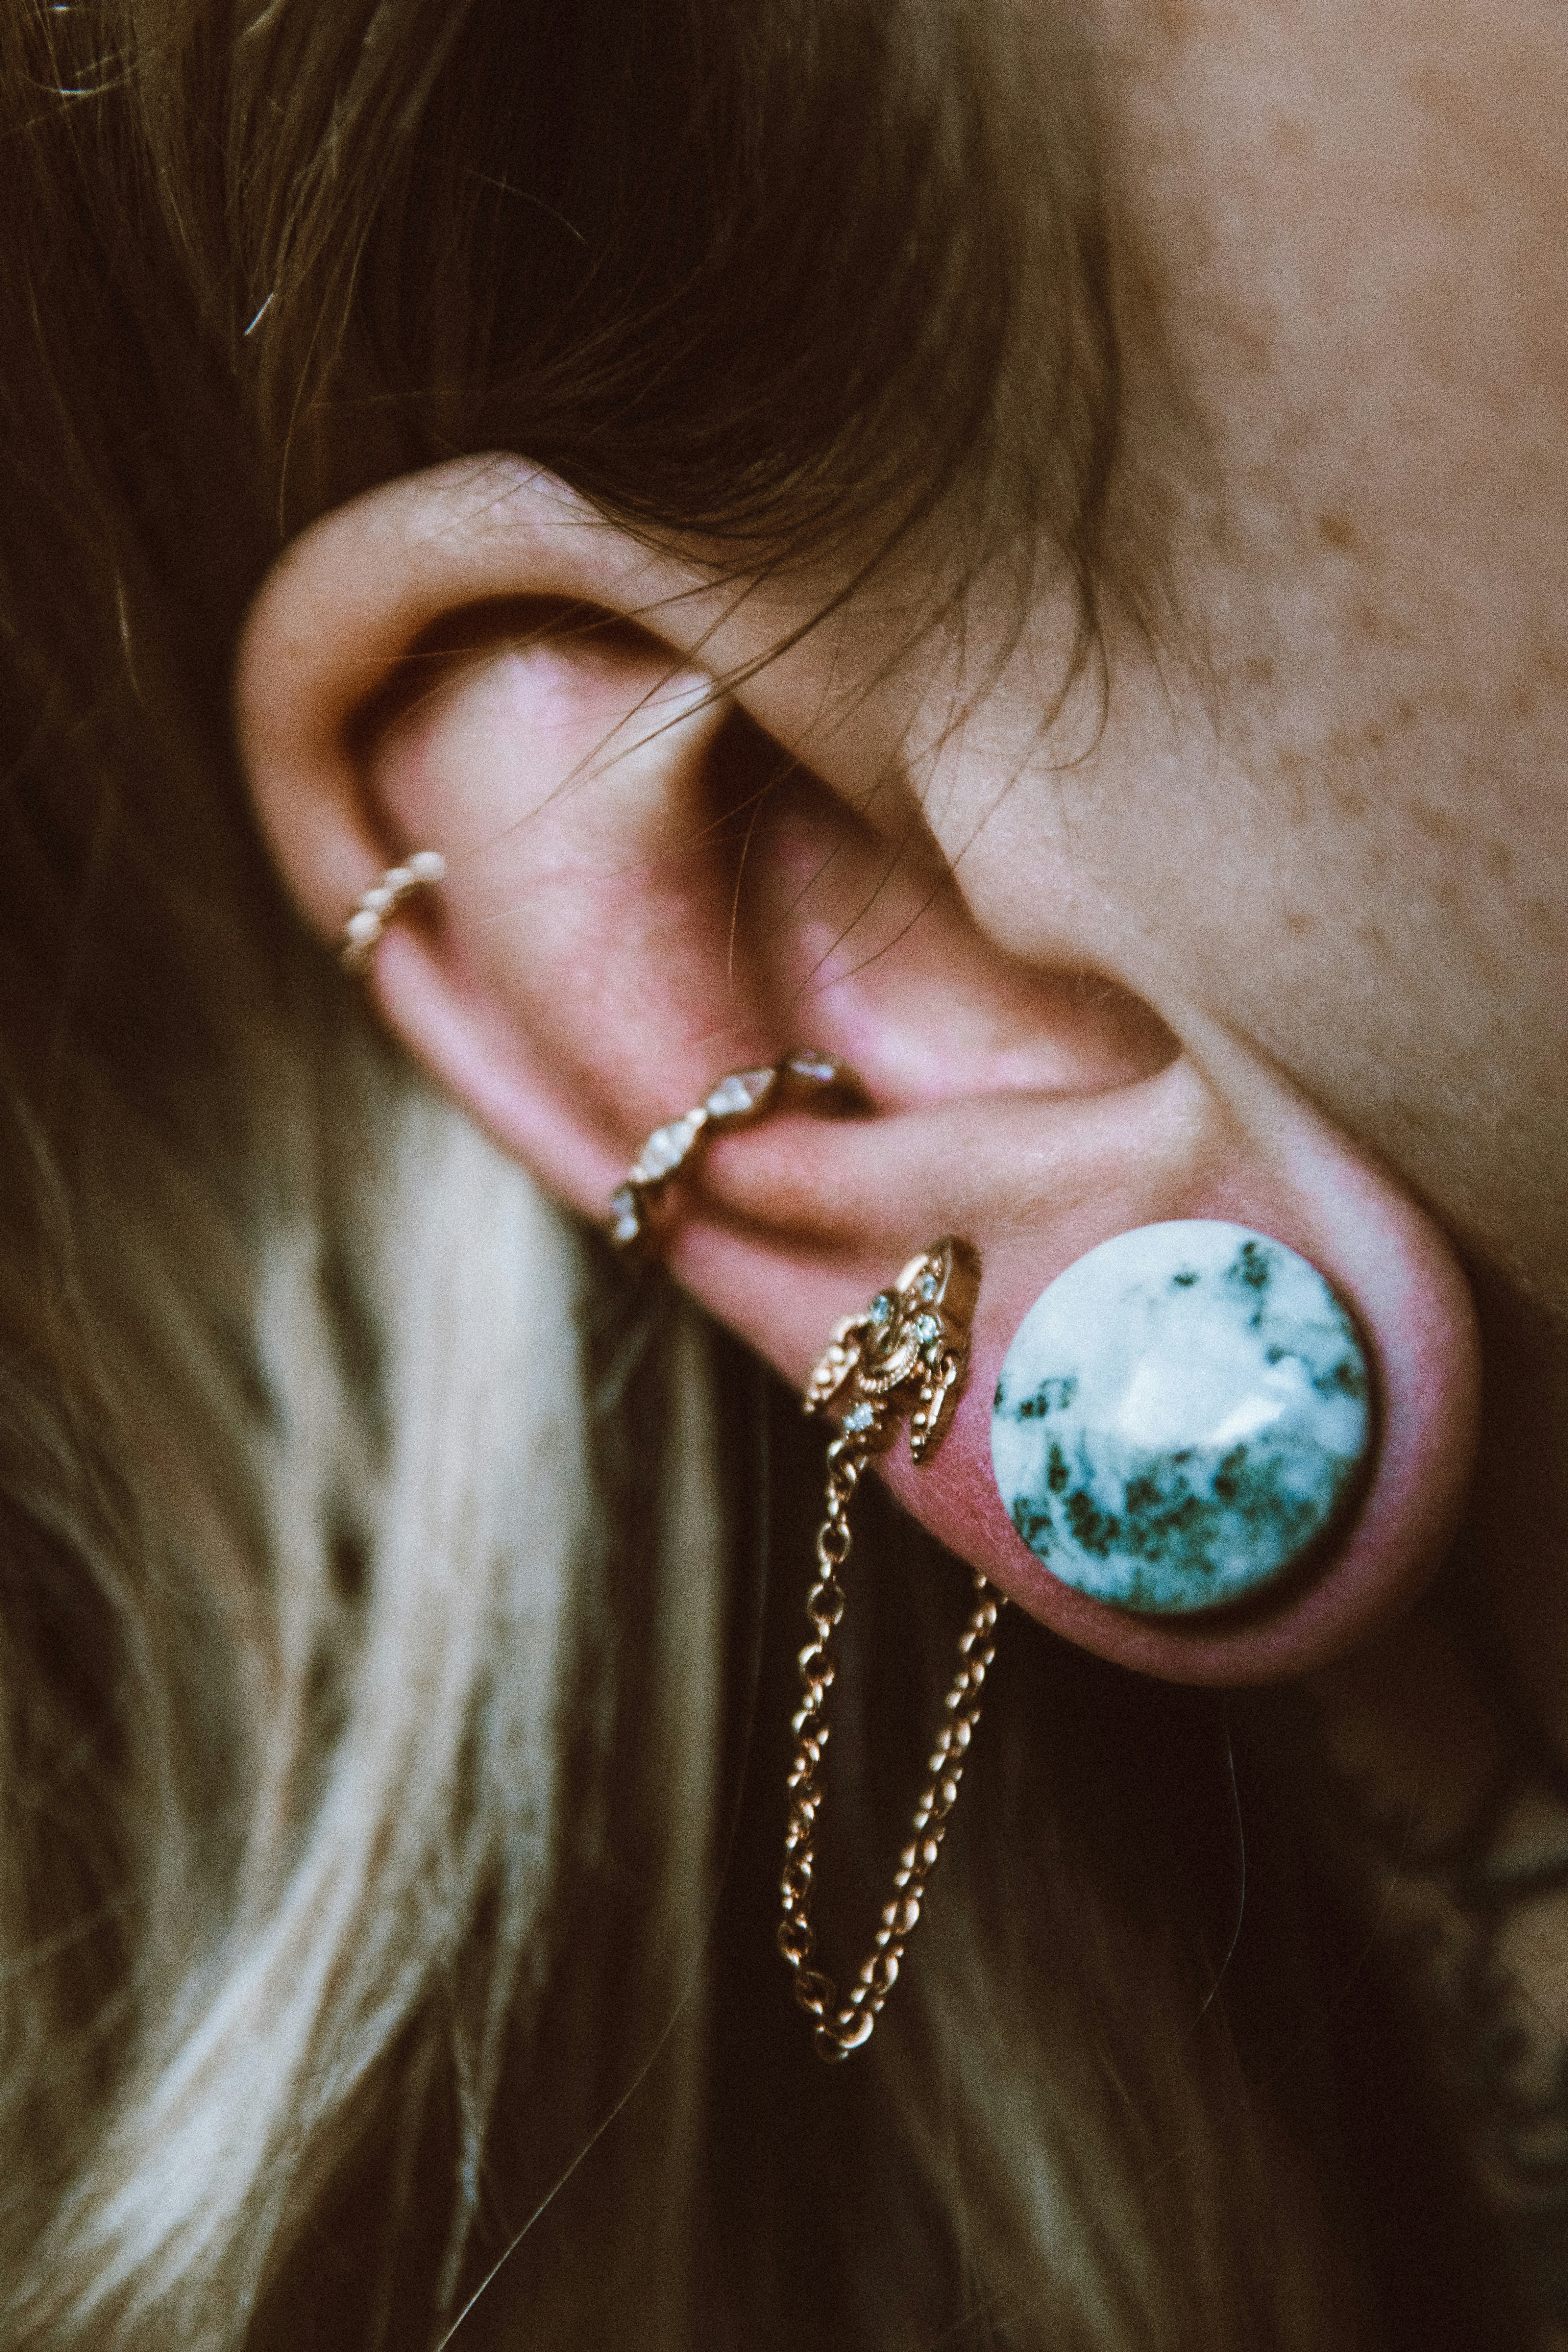
Choosing the Right Jewelry
When embarking on the journey of piercing yourself at home, one of the most critical aspects is selecting the appropriate jewelry. The right jewelry not only enhances the aesthetics of your piercing but also contributes significantly to the healing process and overall safety. A variety of factors must be considered to ensure that the jewelry you choose aligns with your piercing goals and health considerations.
The material of the jewelry is essential. Surgical stainless steel, titanium, and niobium are preferred options because they are hypoallergenic and unlikely to cause irritation. Avoid jewelry made of non-sterile materials such as plastic or nickel, as they can lead to infections or allergic reactions. If you have sensitive skin or a history of allergies, opting for titanium or surgical steel is advisable.
Size is another crucial factor to contemplate when piercing yourself. The gauge (thickness) of the jewelry should be suitable for the anatomy of the area to be pierced. For instance, a larger gauge may be required for cartilage piercings than for lobe piercings. Additionally, the length of the jewelry must accommodate any swelling that may occur during the healing process. Standard lengths may vary, so ensuring a proper fit is essential for comfort.
Style should also match your personal preference, but it is wise to choose jewelry that is simple and has a smooth finish initially. Studs or simple hoops are often recommended for new piercings, as they minimize the likelihood of snagging or irritation. As you gain more experience and confidence in piercing yourself, you may explore more elaborate options, but a conservative approach is advisable during the initial healing phase.
By carefully considering these factors, you can select jewelry that not only suits your aesthetic desires but also promotes a safe and healthy healing process following your at-home piercing experience.

Finding the Perfect Spot: Marking Your Skin
Before you proceed with piercing yourself, it is crucial to carefully select and mark the precise location on your skin. The success of any at-home piercing largely hinges on this initial step. Firstly, take the time to decide where you want the piercing—whether it’s an earlobe, nose, or another area. Consider the anatomy of your body, as well as your personal style, which will help you identify the most suitable spot.
Once you’ve chosen the area, gather your tools, including a measuring tape or ruler, a skin-safe marker, and a mirror. Begin by measuring the area to ensure that the markings are symmetrical, if applicable. For instance, if you are marking for a second earlobe piercing, measure the distance from the existing piercing to maintain even spacing. Accuracy is key in this step; any miscalculation may affect the overall look of your piercing.
Next, use the skin-safe marker to outline the exact point where you will create the piercing. It’s advisable to mark a small dot without applying too much pressure, as this will not only help you locate the spot but also minimize any discomfort during the process. Stand in front of a mirror to view the markings from different angles, ensuring that they align with your expectations. Additionally, it can be helpful to show your markings to a trusted friend for a second opinion, as another perspective may reveal imbalances that were not previously considered.
Following these steps ensures that you are adequately prepared for the next phase: the actual piercing. Marking your skin with care helps avoid unnecessary complications and enhances your confidence when piercing yourself at home. Taking the time to find the perfect spot will contribute significantly to the overall success of the piercing process.
Aligning the Needle with Precision
One of the most crucial aspects of piercing yourself at home is the precise alignment of the needle with the marking on your skin. Proper alignment is essential not only for achieving a clean and aesthetically pleasing result but also for minimizing the risk of complications such as infection and improper healing. To start, ensure that the marking is clearly visible. Use a surgical marker that is specifically designed for skin. Mark the entry and exit points of the piercing carefully, as this will guide your needle’s path. Some individuals find it beneficial to use a ruler or caliper for symmetry, particularly for piercings that require an exact position, such as ear lobes and nostrils.
Once you have marked your skin, it is important to hold the needle at the appropriate angle. Generally, a 90-degree angle is advised, especially for cartilage piercings. This positioning helps the needle to penetrate the skin smoothly and reduces the chances of backtracking. For softer tissue like the earlobe, the needle can be angled slightly, but always maintain a straight trajectory toward the opposite marking. Before proceeding, take a moment to ensure that your hands are steady, as any shaking could lead to an uneven piercing.
In addition to angle and steadiness, consider the placement of your free hand. Using one hand to stabilize the skin around the piercing site will help create tension, making it easier to insert the needle without resistance. This tension helps avoid complications related to the skin’s elasticity. Always remain calm and focused during the procedure, and try to anticipate the needle’s path as it enters and exits the skin. Being meticulous in your approach will significantly enhance the safety and success of your DIY piercing experience.
The Moment of Truth: Piercing Technique
The procedure of piercing yourself can evoke a range of emotions, from excitement to anxiety. However, ensuring a successful outcome lies significantly in your technique. To begin, it is crucial to gather your piercing supplies, which ideally include a sterilized needle, appropriate jewelry, antiseptic solution, and clean retraction equipment to ensure an unhindered piercing process.
When you’re ready, find a comfortable, quiet spot where you can focus entirely on piercing yourself. Take a moment to breathe deeply and visualize a smooth, successful piercing process. This mental preparation can help mitigate anxiety. Remember, remaining calm is key. Once you feel centered, hold the needle firmly and position it against your skin at the predetermined location, ensuring that it is perpendicular to the surface.
To accomplish the piercing in one swift motion, you must apply steady pressure as you push the needle through your skin. It’s important to suppress the urge to hesitate during this step; a deliberate, confident motion is far less painful than multiple attempts. If you feel uncomfortable or if the pain becomes overwhelming, pause, breathe, and reassess your approach. Utilizing a numbing cream or ice pack on the area beforehand can ease discomfort significantly, allowing for a more manageable experience.
Once the needle has passed through, quickly insert your jewelry to maintain the piercing and minimize bleeding. Afterward, properly clean the area with an antiseptic solution, ensuring to take effective care of your new piercing going forward. This will promote healing and help avoid infection. Remember, the piercing experience should be as positive as possible, so take your time and allow yourself to feel empowered in this process.
Replacing the Needle with Jewelry
Once the needle has been successfully inserted into the desired area, the next critical step in the at-home piercing process is replacing the needle with the chosen jewelry. This transition is vital to ensure that the piercing remains open and allows for healing. Proper techniques must be employed to make this procedure smooth and safe, minimizing any potential complications.
To begin, it is essential to prepare the jewelry beforehand. Ensure that all jewelry is made of body-safe materials, such as surgical stainless steel, titanium, or gold, as these materials are less likely to cause irritation or allergic reactions. Clean the jewelry with an antiseptic solution prior to insertion, and ensure it is stored in a clean, dry environment to prevent contamination.
When it’s time to remove the needle, do so with careful precision. Grasp the needle firmly and pull it out in a gentle, steady motion. Avoid twisting or jerking, as this can cause unnecessary trauma to the tissue. Immediately after the needle is removed, you should have the jewelry ready for insertion. Align the initial end of the jewelry with the opening of the piercing and gently slide it into place. Aim to do this smoothly to prevent any sharp movements that could disrupt the healing process.
Once the jewelry is inserted, ensure that it is secured properly. For threaded or screw-on jewelry, make certain that the backing is tightly affixed. This will help prevent the jewelry from falling out or shifting, which can lead to complications. It is also advisable to check the fit of the jewelry regularly, particularly in the days following the piercing, as swelling may occur. Maintaining cleanliness around the piercing site is crucial during this period to reduce the risk of infection.
- Soin optimal pour tous les piercings, modifications corporelles, bouchons et tunnels !
- ProntoLind Gel convient particulièrement à toutes les zones qui sont recouvertes d’un pansement après piercing. (p. ex. …
- conviennent également pour les nez et les piercings d’oreilles, car ils collent bien et protègent ces endroits de manièr…
Aftercare: Cleaning Your New Piercing
Proper aftercare is crucial when piercing yourself or having someone else perform the piercing. This care ensures that the piercing heals well and reduces the risk of complications, such as infection. One of the primary tasks in aftercare is the cleaning of the new piercing. The recommended method for cleaning is with a saline solution, which can be easily made at home or purchased from a pharmacy. To create a saline solution, mix one teaspoon of non-iodized sea salt with eight ounces of distilled water. It is essential to avoid using tap water, as it may contain bacteria that could lead to infection.
Once the saline solution is prepared, you should clean the area around the piercing twice a day. Using a clean cotton ball or pad, apply the saline solution to the pierced area and gently clean around the hole. Make sure to avoid twisting or moving the earring back and forth, as this can irritate the piercing and slow down the healing process. It is also advisable to refrain from using alcohol or hydrogen peroxide, as these can be too harsh and may delay healing instead of aiding it.
In addition to regular cleaning, consider taking preventive measures to avoid infection. Avoid touching your newly pierced area with dirty hands, and do not swap earrings until the piercing is fully healed, which could take several weeks to a few months, depending on the individual’s healing capacity. Also, keep hair products, perfumes, and other potential irritants away from the area during the healing phase.
As the body heals, it is common to experience some swelling, tenderness, or a small amount of discharge. These symptoms are typically part of the normal healing process, but if you observe excessive redness, increased pain, or unpleasant odors, it is crucial to consult a healthcare professional immediately, as these could be signs of an infection. Maintaining a consistent aftercare routine will help ensure that your at-home piercing remains healthy and free of complications.